How to change a Background in Photoshop
- Kristy Brown
- Feb 3, 2018
- 2 min read

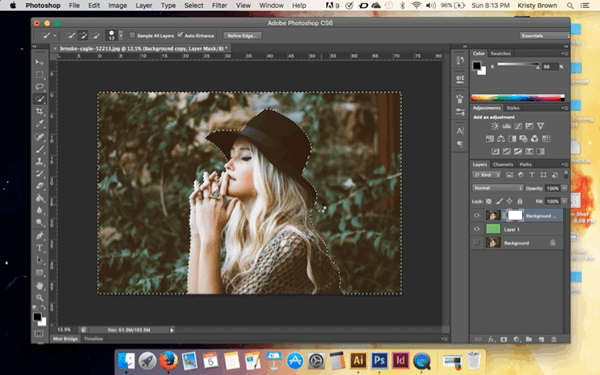
Changing a background of an image is one of the top things I get asked about so I decided to show how I change a background. There are so many different ways one can do this in Photoshop, but I am going to show the way I prefer. I first learned this way in one of my design classes in college and just thought it cut out images so smoothly that I kept on using the technique. I am hoping that you will also find this technique useful for whenever you need to change a background.
I do have a video on how to do this on Youtube which you can view here…
However, if you don’t prefer video, I also have steps listed below…
Lets get to it :)
Step 1: Open Image
Step 2: Duplicate background layer
Step 3. create layer mask on new background copy layer
Step 4. create new layer and drag it below the " background copy layer"
Step 5. Fill new layer with a green color (or any color)

Step 6. Click on the layer mask
Step 7. make sure your "foreground" color is set to black and "background color to white.

Step 8. click on the "quick selection tool" and start tracing around the girl. you may have to toggle between the + and - so you don’t erase any part of the girl.


Step 9. when done… fill it with the color black and the background will turn green or any color you have in your "layer 1"

Step 10. Go to paintbrush tool and keep the foreground color black and fine toon the edges of the girl. You can decrease or increase size of the brush by click on the bracket keys "[" "]" on your keyboard.

Step 11. keep fixing edges until satisfied.
Step 12. ALT/option click on the layer mask to switch to black and white mode. Make sure no black lines are in the white area.

** just make sure to change your foreground to white and background to black so you can erase the black lines if any.
Step 13. alt click layer mask to switch out of black and white mode.
Step 14. Command/CTRL click the layer mask to select all of the new cut out image.
Step 15. copy merged image
Step 16. open new document and paste
Step 17. fill background layer with color of your choice.
Step 18. right click image and click on load selection, click Okay.
Step 19. right click image, click "refine edge"

Step 20. Now you can save your image as a Jpeg and you're all done!
Now that you completed this tutorial, I hope you have learned how to change a background. This technique is definitely my favorite way to do the job and I strongly believe it will be yours too.
If you have any questions on this tutorial please ask away in the comments below, I will answer them as soon as I can.


Komentar